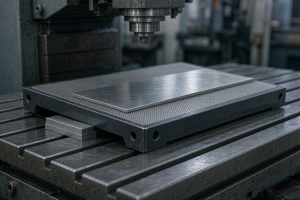
Thin-walled aluminum parts are where most workholding decisions go wrong. Clamp a 2 mm wall in a vise and it deflects; after unclamping, the part springs back and your tolerances are gone. A dovetail fixture solves this by gripping the part from below — cutting a short dovetail tab into the raw stock edge or into sacrificial material at the part base, then pulling it down onto a plate with a wedge or sliding clamp. The clamping force runs parallel to the cutting plane instead of squeezing across it, so the walls stay free for the spindle to reach from five sides in one setup.
This guide explains how a dovetail fixture actually holds a part, how to size the tab and estimate pull-out force, when it beats a 5-axis vise or vacuum, and what to check before you commit your first batch.
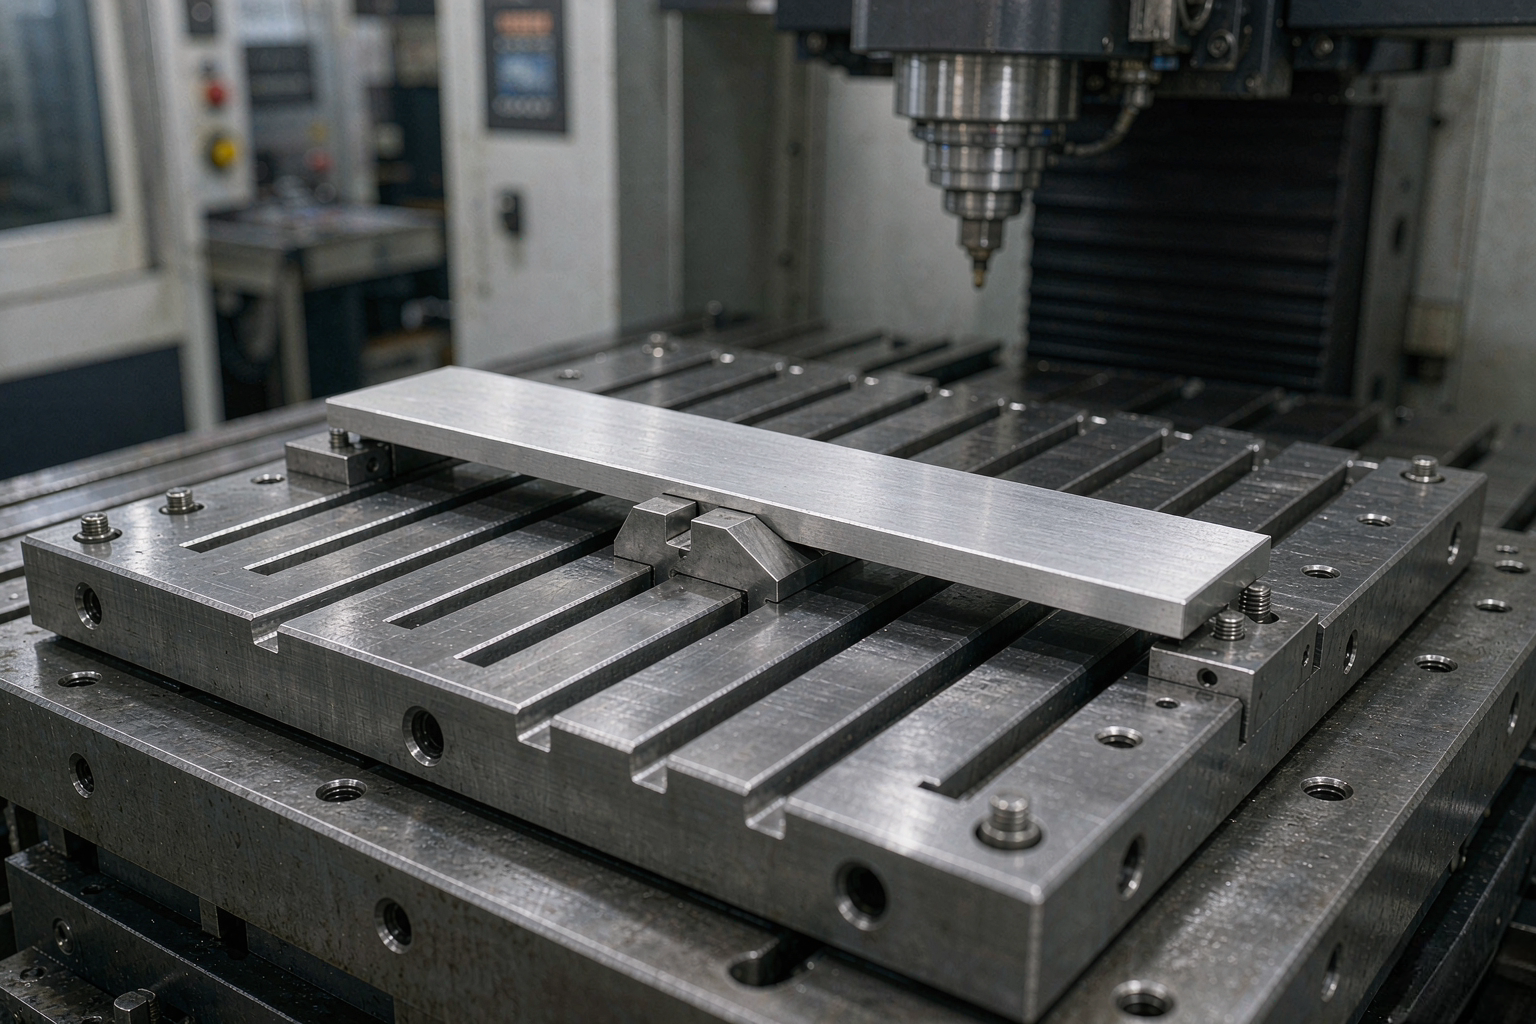
How a Dovetail Fixture Holds the Part
A dovetail fixture is a plate — steel or cast iron, precision-ground on top — carrying rows of dovetail slots or raised dovetail rails. The raw stock is prepared with a matching dovetail groove, typically machined in a first operation on the same machine or a lathe. A wedge block or sliding clamp drops into the slot and, as it is pushed forward, cams the workpiece down and back against the fixture’s locating surfaces.
The force direction is the whole point
Vise jaws apply compressive force across the part. A dovetail wedge applies force mostly downward and slightly outward along the tab flanks, wedging the part into the pocket. Because the walls above the tab carry no clamp load, you can machine them in a stress-free state — the number one reason aerospace and electronics shops run thin plates on dovetails.
Material left for the tab is not waste
The dovetail tab costs raw material: usually 3–8 mm of perimeter stock left on the blank. On expensive alloys this is real money, which is why dovetail workholding pays off best on aluminum, brass, and mid-volume plates where cycle-time savings outweigh material overhead.
Dovetail Tab Design: Angle, Depth, and Pull-Out Force
The standard dovetail angle is 45° or 60° per flank. A 60° flank gives more wedge gain — more downforce per unit of push force — but is more sensitive to chips packing in the groove. Most off-the-shelf systems use 45°.
Estimating pull-out resistance
What matters in cutting is not how hard the wedge pressed the part down, but whether the tab can resist the cutting forces trying to slide or lift the part. A workable first estimate for aluminum on a ground plate:
Approximate lateral resistance ≈ µ × Fdown + tab shear area × material shear strength, where µ is the friction coefficient (0.1–0.15 with coolant film on ground steel), and Fdown is the wedge-induced normal force. In practice, the tab itself fails before the part slides: a 45° tab, 5 mm deep, in 6061-T6 has roughly 30–40% more shear margin than a 3 mm tab, which is why deep pockets and heavy roughing call for the deeper geometry.
Tab depth rules of thumb
- Finishing thin walls under 1.5 mm: 3 mm tab is enough — you are taking light passes, and less stock removal at the end.
- General 5-axis plates, 2–4 mm walls: 5 mm tab, the system default.
- Heavy roughing or steel parts: 8 mm tab plus two opposed wedges per part.
Dovetail Fixture vs 5-Axis Vise vs Vacuum vs Tab Clamps
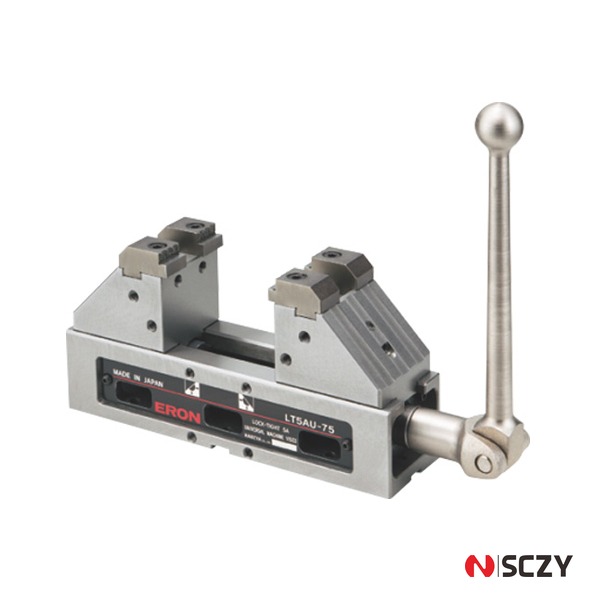
A 5-axis vise (above) grips the part from two or six sides and shines on prismatic blocks. The table below shows where each method wins on thin-wall 5-axis work:
| Criterion | Dovetail fixture | 5-axis vise | Vacuum chuck | Tab / edge clamps |
|---|---|---|---|---|
| Thin-wall deflection | None — walls unclamped | High risk | None | Low–medium |
| 5-side access in one setup | Yes (top + 4 sides) | 4–5 sides | Top only | Limited |
| Lateral force resistance | High (tab shear) | High | Low, needs stops | Medium |
| Blank preparation cost | Dovetail op required | None | Flat face only | Drill/tap holes |
| Material overhead | 3–8 mm perimeter | Jaw grip height | None | Tab stock |
| Part density per pallet | Very high | Medium | High | Medium |
| Wet/dry compatibility | Both | Both | Seal-sensitive | Both |
The pattern to notice: dovetail fixtures and vacuum chucks both leave the walls free, but only the dovetail resists serious lateral cutting force without shear stops. That combination — free walls plus lateral rigidity — is exactly what aggressive 5-axis aluminum cutting demands.
Choosing a System: Plate, Clamps, and Interface
Plate register and interface
The fixture plate needs to repeat on your machine in seconds. Most systems mount through a zero-point or grid-plate interface; budget systems bolt straight to T-slots and rely on re-indicating, which erases the setup-time advantage. If your machines already run tombstones or grid plates, choose dovetail rails that bolt onto that pattern rather than a standalone plate.
Clamp types
- Wedge clamps: the default; one screw drives a wedge that pulls the part down. Watch torque — over-torquing a 45° wedge in a shallow tab is the classic way to crack the tab corner.
- Screw-down top clamps with dovetail locators: for parts that also need a positive Z stop.
- Cam-edge clamps: fastest for cycle-heavy production, least flexible on tab geometry.
Hardened rails vs soft plates
Hardened ground rails last years in aluminum; soft steel plates let you re-machine the dovetail pockets yourself for odd-sized blanks, but wear faster and lose repeatability. Shops running mixed batches usually keep one of each.
Common Failure Modes and How to Avoid Them
Tab crack at the corner
The dovetail’s sharp internal corner is a stress riser. If your blank preparation leaves a square corner, the first heavy pass can start a crack. Mill a small relief radius into the tab corners and torque wedges to spec, not by feel.
Chip packing in the groove
Aluminum chips wedge into dovetail slots and lift the next part 0.02–0.05 mm — enough to scrap a thin wall. Blow out the slot between cycles and consider 60° flanks only if your coolant and air-blast coverage is thorough.
Pull-out during heavy passes
When a part pulls out mid-cycle, the cause is almost always insufficient tab depth for the radial engagement, not the fixture itself. Drop radial depth of cut, raise spindle speed, or move to a deeper tab before blaming the wedge.
Workflow: From Blank to Finished Thin-Wall Part
- Op 1: machine the dovetail groove into the blank perimeter (2–3 min on most parts).
- Op 2: load blank onto the rail, seat against the locators, torque the wedge to spec.
- Op 3: 5-axis rough and finish walls, top, and edges in one setup — no clamp shadows on any finished surface.
- Op 4: release, snap the finished part off the tab line, and deburr the residual tab footprint.
Because the fixture plate repeats at the same Z reference every cycle, tool length offsets carry over between batches — the setup time amortizes almost to zero.
Is a Dovetail Fixture Right for Your Parts?
Choose dovetail workholding when your parts are plate-like with thin walls, tolerances under 0.1 mm, made from aluminum or brass, and produced in repeat batches. Stay with a quality 5-axis vise when parts are chunky blocks that need jaw grip on prismatic faces, and stay with vacuum when parts are large, flat, non-ferrous sheets with light passes. In mixed shops, the dovetail plate is the piece that unlocks lights-out thin-wall work.
Get Thin-Wall Parts Done Right
SCZY supplies and configures workholding for 5-axis production — dovetail systems, precision vises, magnetic and vacuum chucks — and helps machine shops match the right holding method to part geometry before the first cut. If you are fighting thin-wall deflection or want a second opinion on fixture selection, reach out at https://www.sczymfg.com/aboutus/ and our engineers will review your part prints and propose a clamping plan.
GET A QUOTE
Looking for 5-axis workholding for thin-wall parts?
Explore our product range or send us your requirements. Our team will be glad to review your inquiry.